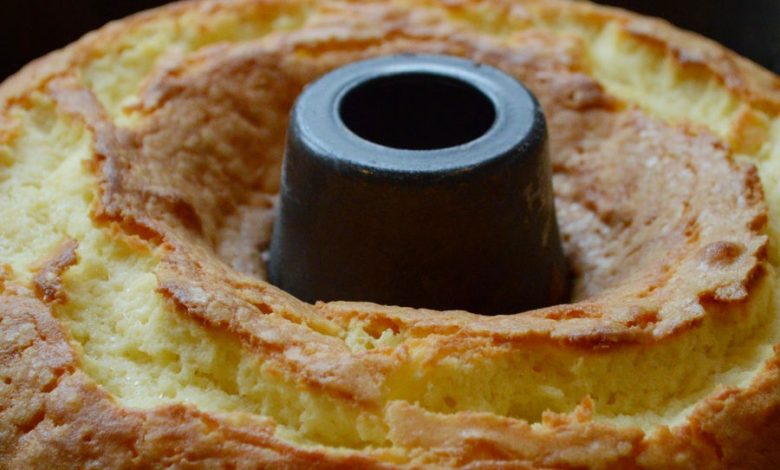
The Ultimate Bishop Cake Recipe

Bishop Cake is a traditional cake from the British bakery repertoire, with fruits that make it popular when rich, moist textures combine with the sweetness of the fruits and warmth of spices during festive occasions. Let this guide—whether you’re an experienced baker or new to the kitchen—enlighten your skills to make the perfect Bishop Cake.
What is Bishop Cake?
A fruitcake not typical in ingredients and historical context, Bishop Cake is an unusual fruitcake. The Bishop Cake does have a much lighter texture than many traditional fruitcakes, which are often heavy or dense, with equally mild or balanced flavors. This cake, named after bishops, reflects the tradition of bishops enjoying this treat for celebrations or when they are congregated.
Ingredients You Will Need
Let’s collect the ingredients to create this scrumptious cake:
- Butter: 1 cup (softened)
- Sugar: 1 cup
- Eggs: 4 large
- All-purpose flour: 2 cups
- Baking powder: 1 teaspoon
- Salt: 1/2 teaspoon
- Ground cinnamon: 1 teaspoon
- Ground nutmeg: 1/2 teaspoon
- Mixed dried fruits: 2 cups (such as raisins, currants, chopped dates, and candied orange peel)
- Chopped nuts: 1 cup (walnuts, almonds, etc.)
- Vanilla extract: 1 teaspoon
- Rum or brandy: 1/4 cup (optional, for soaking the fruits)
Preparing the Ingredients
Before we jump into the baking process, we’ll need to do a mise en place.
Soaking the Fruits
If using rum or brandy, soak the mixed dried fruits in the alcohol for at least a few hours, preferably overnight. This adds another dimension of flavor and ensures the cake retains moisture.
Preparing the Nuts
Finely chop the nuts, so they are uniform. This ensures they distribute evenly throughout the cake and prevents large chunks from disrupting the texture.
Baking Equipment
Have the following equipment on hand:
- Mixing bowls: Various sizes
- Electric mixer: For creaming butter and sugar
- Measuring cups and spoons: Accurate measurements are key
- Spatula: For mixing and scraping
- Cake pans: Two 9-inch round pans or one 9×13-inch rectangular pan
- Parchment paper: For lining pans
- Cooling rack: To set cakes on after they come from the oven
Step-by-Step Baking Instructions
Now that everything is prepared, it’s time to bake!
Step 1: Preheat the Oven
Preheat your oven to 325°F (163°C). This lower temperature helps the cake bake evenly without scorching the crust before the insides are fully cooked.
Step 2: Prepare the Cake Pans
Line your cake pans with parchment paper and lightly oil them. This ensures the cakes release easily after baking and prevents sticking.
Step 3: Cream the Butter and Sugar
Cream the softened butter and sugar in a large mixing bowl together until light and fluffy; this process incorporates air, resulting in a lighter cake.
Step 4: Add the Eggs
Gradually beat in the eggs, one at a time, beating well after each addition. This method helps the eggs fully incorporate and maintains the mixture’s aeration.
Step 5: Mix Dry Ingredients
Whisk together the flour, baking powder, salt, cinnamon, and nutmeg in a separate bowl. These dry ingredients add structure and flavor to the cake.
Step 6: Combine Wet and Dry Ingredients
Slowly incorporate the dry mixture into the butter mixture, mixing on low speed until just combined. Overmixing can make the cake dense.
Step 7: Add Fruits and Nuts
Carefully fold in the soaked dried fruits, chopped nuts, and vanilla extract until the mixture is uniform.
Step 8: Pour into Pans
Divide the batter evenly between the prepared cake pans, smoothing the tops with a spatula.
Step 9: Bake
Bake in the preheated oven for 60 to 70 minutes, or until a toothpick inserted into the center of the cake comes out clean. Baking times may vary depending on your oven and the size of your pans.
Step 10: Cool
Once baked, remove the cakes from the oven. Let them cool in the pans for about 10 minutes, then transfer to a cooling rack to cool completely.
Serving and Storing Bishop Cake
Bishop Cake is best served after it has had time to mellow and develop its flavors. Here are some tips on serving and storing:
Serving Suggestions
- Plain: Enjoy a slice of Bishop Cake on its own to savor the rich flavors and moist texture.
- With Cream: Delicious as it is, garnished with a dollop of whipped cream or served with vanilla ice cream for a naturally rich dessert.
- Toasted: Lightly toast a slice and spread with butter for a delicious breakfast or snack.
Storing the Cake
- Room Temperature: Keep the cake in an airtight container at room temperature for up to a week.
- Refrigeration: For longer storage, keep the cake in the refrigerator. It will stay fresh for up to two weeks.
- Freezing: Bishop Cake freezes well. Wrap individual slices in plastic wrap, then place them in a freezer-safe container for up to three months. Thaw at room temperature before serving.
Tips and Variations
Here are some tips and variations to make your Bishop Cake even more special:
Flavor Enhancements
- Citrus Zest: Add the zest of one orange or lemon to the batter for a fresh, zesty flavor.
- Spices: Feel free to experiment with different spices like cloves, allspice, or cardamom for your own personal touch.
Glazing and Decoration
- Glaze: Drizzle a simple glaze made from powdered sugar and lemon juice over the cooled cake for added sweetness and decoration.
- Nuts and Fruits: Garnish the top of the cake with additional chopped nuts and dried fruits before baking for a beautiful presentation.
Dietary Modifications
- Gluten-Free: Substitute the all-purpose flour with a gluten-free flour blend to accommodate dietary restrictions.
- Reduced Sugar: Reduce the amount of sugar in the recipe or use a sugar substitute for a lower-calorie version.
